Mrs. Lyndy Higgins
  • Home
  • About
  • Contact
  • classes
    • MHHS IT Squad
    • Fundamentals of Information Technology
    • Network Basics
    • Computer Support Essentials
    • Programming Fundamentals
    • AP Computer Science
    • Interactive Media Graphics >
      • Graphics Assignments
      • Adobe- Photoshop
    • Interactive Video >
      • Adobe- Premier Pro
      • Adobe- Photoshop
      • Adobe- Prelude CC
    • Principles of Web Design
    • Skills Stack
  • Business Professionals of America
  • Senior Project
  • Useful Links
  • Chromebook Problems

Interactive Media Video

ACA Test Prep
Google Classroom

INTERACTIVE MEDIA – VIDEO      9-12 Semester
Prereq. – Fundamentals of Information Systems.
This course designed to provide in-depth knowledge of audio-visual production equipment and processes. Students will be introduced to video editing skills and techniques for planning, designing and developing video. Skills to be obtained are file management, audio and video capturing, adding events to timelines, editing multiple video tracks, transitions, voice over production, and key framing.
Students will study and practice to PASS the Nationally Recognized Adobe Premier Pro Certification Test (this test is worth 25% of their grade and is a Pass/Fall test. Passing to a 700 or higher)

 
INTERACTIVE MEDIA – VIDEO II  10-12  Semester
Prereq. – Interactive Media – Video I. 
A course designed to build on the skills and knowledge established in Interactive Media I. Soundtrack creation, multiple camera editing, story line development, and advanced video capturing represent the framework for this course. Skills to be learned include masking, editing, and special FX and DVD authoring. Culminating activities include integrating acquired skills and abilities with school, business or community needs. Will include a more in depth look at Premiere Pro and Animate with an emphasis on meeting a need. 
Students will learn to use Animate and After Effects in their Videos. Students will produce a minimal of 4 Personal Project throughout the semester. These projects will based off of the techniques learned from Animate and After Effects. Students will study and practice to PASS the Nationally Recognized Adobe Animate Certification Test (this test is worth 25% of their grade and is a Pass/Fall test. Passing to a 700 or higher)


Students can study for the ACA Test Prep though our class portal:
https://spark.adobe.com/page/3ISti/ 
For Username and Password information you must be enrolled in Mrs. Higgins class

Picture

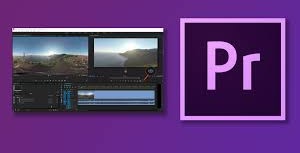
PREMIERE PROGRAM OVERVIEW: Adobe Premiere is a video editing software package suitable for both amateur enthusiasts and professionals. Like most editing software. Premiere works by importing video from a source such as a video file onto your hard drive, then allowing you to create new edited versions which will allow you to export onto your computer as a video file. Premiere is a powerful editing tool, capable of producing broadcast-quality and high-definition video.

PROGRAM OBJECTIVES: Import video, audio and graphics in a wide variety of formats. Edit, manipulate and arrange these elements on a visual timeline. Add effects, filters, titles, etc. Export your edited video in a variety of formats.
​
TUTORIAL INSTRUCTIONS Below is a tutorial allow you to see how to properly Import files, Edit, Piece Together Clips, and Titles, as well as Export. Follow along, take notes, and if you would like to follow the project and do an edited version yourself, Click download below this paragraph and load all of the project files to your computer.

1. Project Setup
Begin by selecting your project and workspace settings.

​

2. Import Media Assets

Use the Media Browser to bring photos, video clips, and audio files into your project, and then organize your assets in the Project panel.

3. Create a Sequence 
Add video and audio clips to the Timeline panel, where you can adjust volume for the right mix of music and narration.

4. Assemble Rough Cut 
Add in and out points to select the part of each video clip you want to include, and use markers to add the shots to your project. It’s easy to make changes along the way. Extend a shot by dragging, change end points with the Rolling Edit tool, and adjust beginning and end frames using the Slip tool.

5. Add Titles 
Begin your video with a professional-looking title using the font and style you prefer.

6. Enhance your video with effects and transitions
Easily adjust the exposure, color, and tone of your shots. Apply transitions to dissolve between your clips. And use keyframes to pan across and zoom in or out on a still photo.
Note:
Because the imported photos have a higher resolution than the imported videos, they will appear cropped when viewed on the timeline. At 5:12 in this video, you’ll see one way to easily scale the photos to match the videos on the timeline. In the newer version of Premiere Pro, the Set to Frame Size command preserves the full resolution of the photos without rasterizing them. Either option will work.

7. Export Video
​
Step 1: Click File (on the top left)
Step 2: Export, select Media
Step 3: Click Format, select H.24 Step
4: Click Preset, select HD 1920x1080, or Match Source
Step 5: Click Output Name (usually highlighted in blue or yellow), select YOUR "Video 1 Folder" and save project.
Step 6: Click Export (hitting cancel or quitting the program will stop video export)


Proudly powered by Weebly
  • Home
  • About
  • Contact
  • classes
    • MHHS IT Squad
    • Fundamentals of Information Technology
    • Network Basics
    • Computer Support Essentials
    • Programming Fundamentals
    • AP Computer Science
    • Interactive Media Graphics >
      • Graphics Assignments
      • Adobe- Photoshop
    • Interactive Video >
      • Adobe- Premier Pro
      • Adobe- Photoshop
      • Adobe- Prelude CC
    • Principles of Web Design
    • Skills Stack
  • Business Professionals of America
  • Senior Project
  • Useful Links
  • Chromebook Problems